In this article we are going to talk about a few javascript/css tricks you can use in the Zendesk Help Center. We had a situation where we want to display some quick navigation links along the top of the help center for ScreenSteps/Zendesk integration, but we only wanted to display these links if the current user was a Zendesk agent or admin.
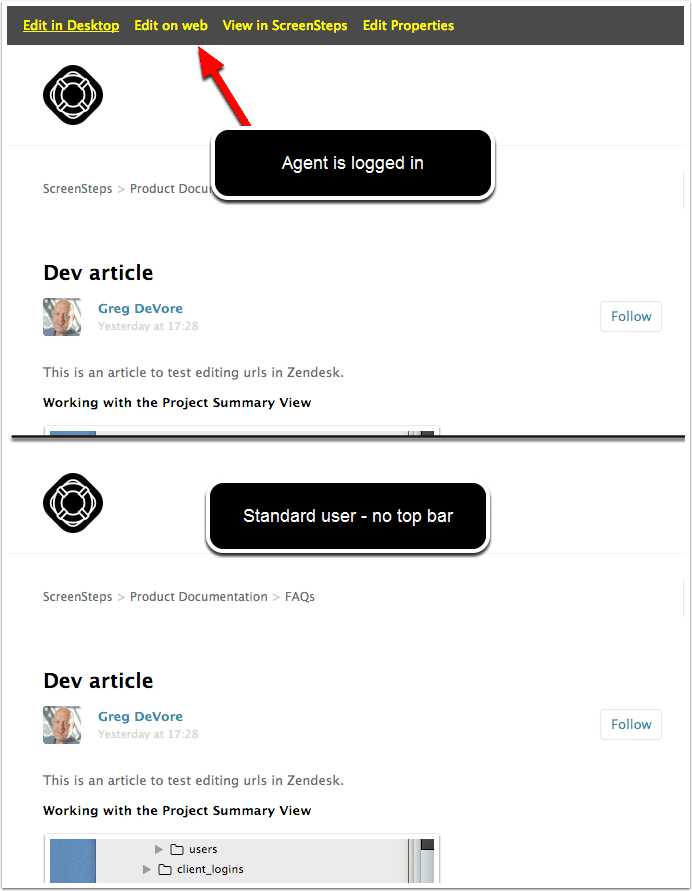
The screenshot below shows the same help center screen when an agent is logged in and when a standard end user is viewing the page. Notice that the black bar along the top only displays for the agent.
To accomplish this we are going to do the following:
- Add some custom HTML to the header of the page
- Add some custom CSS
- Add some custom javascript to show or hide the top bar based on who is logged in.
Add the HTML
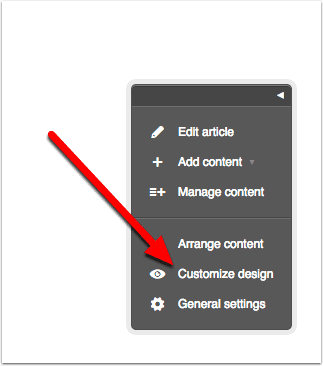
1.1 Select "Customize design"
Go to your Help Center and select Customize design
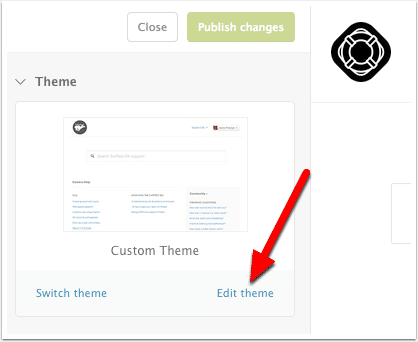
1.2 Select "Edit Theme"
1.3 Edit the Header
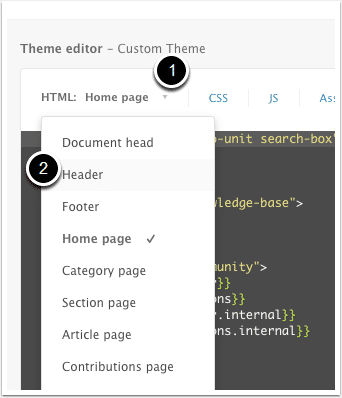
We are going to add some HTML right above the header.
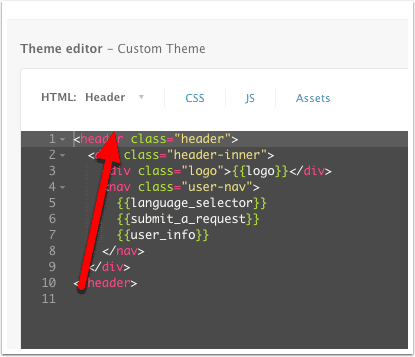
1.4 Insert HTML
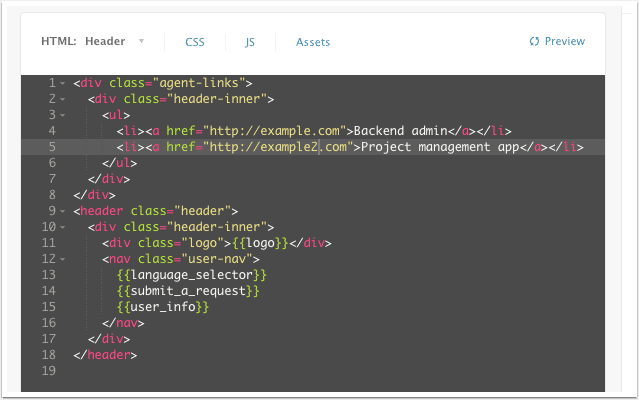
Here is the HTML I am adding. It can really be whatever you want.
<div class="agent-links">
  <div class="header-inner">
    <ul>
      <li><a href="http://example.com">Backend admin</a></li>
      <li><a href="http://example2.com">Project management app</a></li>
    </ul>
  </div>
</div>
2. Add CSS
Now we are going to add some CSS for our .agent-links div.
2.1 Switch to CSS tab
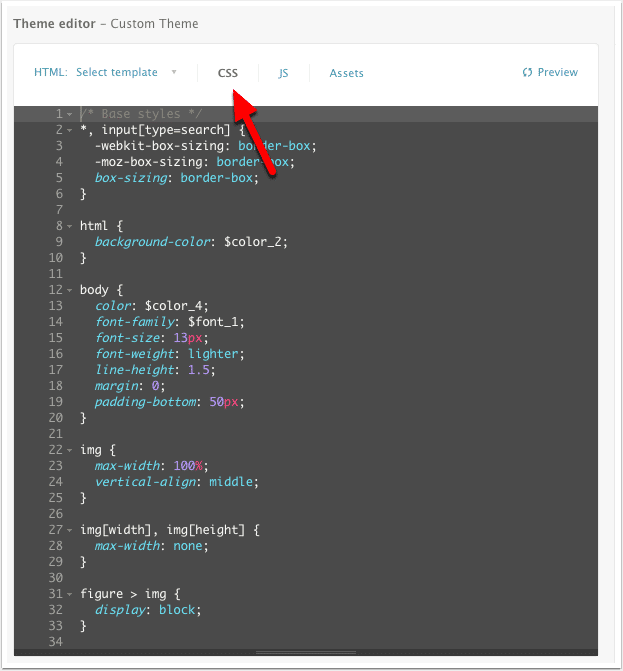
2.2 Add CSS
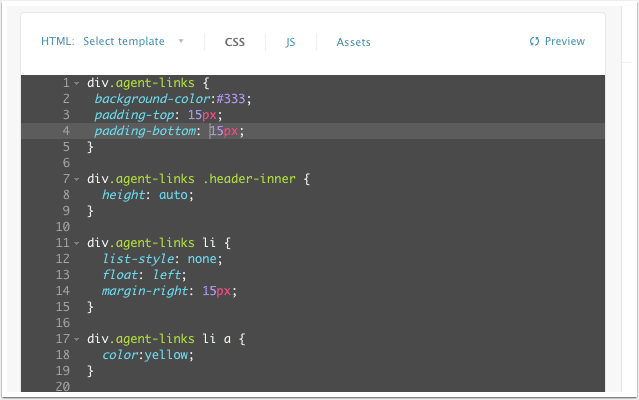
Insert some custom CSS at the top of your CSS file. You can modify this however you would like.
div.agent-links {
  background-color:#333;
  padding-top: 15px;
  padding-bottom: 15px;
}
div.agent-links .header-inner {
  height: auto;
}
div.agent-links li {
  list-style: none;
  float: left;
  margin-right: 15px;
}
div.agent-links li a {
  color:yellow;
}
2.3 Preview your changes
Select Preview. You should see something like the screenshot below.

3. Add Javascript
Finally, we are going to add the necessary javascript. But before we do that we need to add one last bit of CSS. We want to hide the .agent-links div by default.
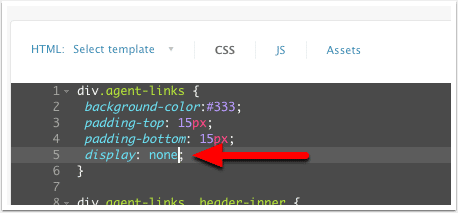
3.1 Hide the div by default
Add display: none; to the div.agent-links CSS.
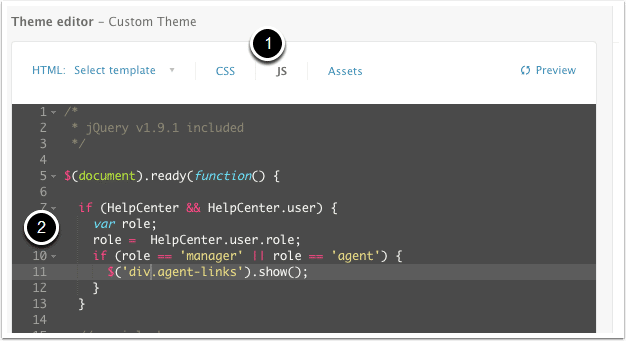
3.2 Switch to JS tab and insert the javascript
Select the JS tab and insert the following javascript right after the line $(document).ready(function() {
if (HelpCenter && HelpCenter.user) {
   var role;
   role =  HelpCenter.user.role;
   if (role == 'manager' || role == 'agent') {
     $('div.agent-links').show();
   }
}
Let me explain the javascript a bit. The HelpCenter object is a javascript object that Zendesk provides to you. Using this object you can find out the following about the current user:
- Organization
- Tags
- Role
- Groups
- Avatar url
- Current locale
There is more in there too. If you want to explore it, open up the javascript console in your browser and type HelpCenter while in your Help Center. You will see all of the attributes you can access.
So, in this code we are checking to see if the object is there and if a user object is attached. We then checking to see if the current user has a role of 'manager' or 'agent'. If they do then we show the .agent-links div.
4. Preview changes
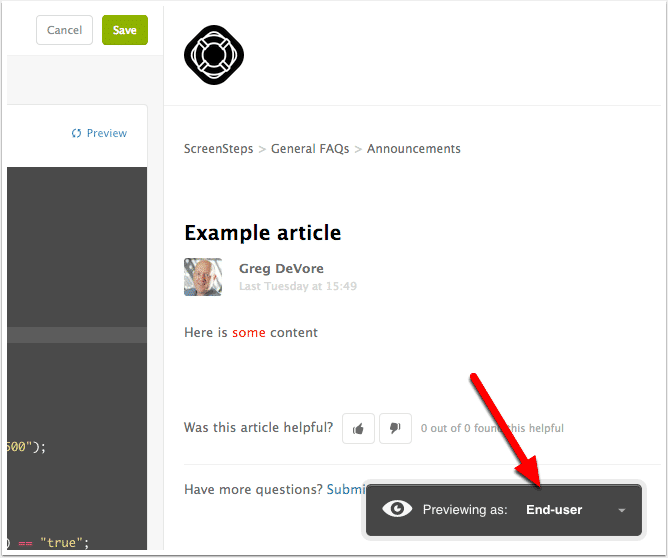
4.1 Preview as End-user
Select End-user from the preview options. You shouldn't see the links along the top.
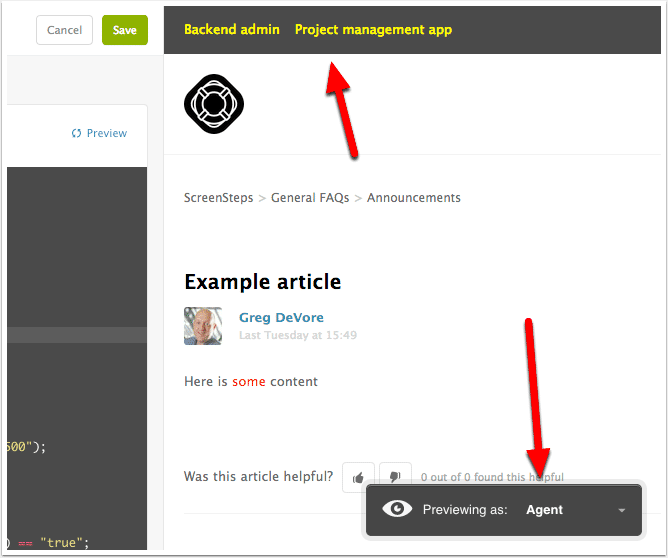
4.2 Preview as Agent
Now switch to Agent. You should see the links.
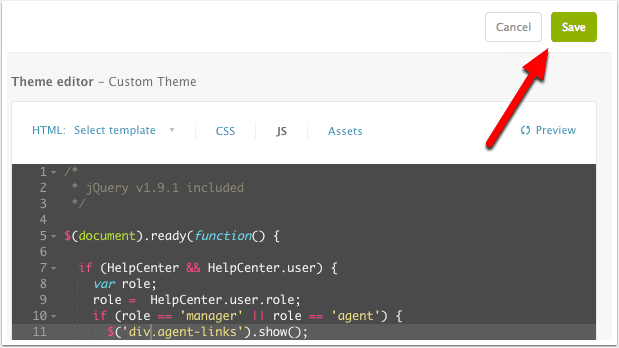
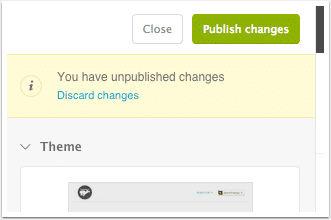
5. Publish
5.1 Select Save
5.2 Select Publish changes
That's it. Hopefully that gives you a good idea about how you can add user-specific information to your Zendesk Help Center.
Let us know in the comments what custom information you might add to your Help Center by using this approach.